Wednesday, May 5, 2010

2010 Maiden Voyage with New Mainsail

Well after a long winter and lots of work getting Rhapsody ready in the spring, we were rewarded with a great day to cruise from Borden Light Marina and Fall River to our slip at the Coasters Harbor the Newport Navy Marina.  First I needed to mount a new Windex to replace the one that got damaged when the mast was stepped the week before.  You can also see the new black Harken Carbofoil contracts sharply against the white mast.  The Carbo foil was significantly "smoother" than the old Tuff Luff for raising and lowering the #1 genoa.  This should be a real benefit for the foredeck crew.
There are some pictures of Warren standing next to the new Hood Vektron main.  Below is a picture of the main flaked across the boom.  The folds are setup to alternate between the slugs in the mast track.
 Since we had a breeze that reached 18-20kts apparent while underway, there was an opportunity to "walk up the mast". 

The picture below isn't taken from an ideal location or calibrated, but does give a pretty good indication of the new Hood mainsail shape.  Note the "speed bubble" just like my North Sails race main.
Overall, this was a very successful maiden voyage.

Saturday, April 24, 2010

Mast Work & Rebed Bow Pulpit

I pulled the mast for some work that included replacing the main halyard sheaves, lubricating sheaves for the jib and spinnaker, replace the headstay, and some cosmetic painting.  Below is where the sheave box is attached.  This was removed, then the area cleaned up and sanded due to some oxidation.  The area was primed with Zinc Chromate paint, then sprayed with Gloss White Krylon.
The sheave box is designed to maintain separation for up to 4 halyards.In the picture below, you can see how the sheaves are on a diagonal to maintain seperation where the halyards turn inside the mast.  Note I have one regular halyard and two messenger halyards installed.
Similary, The external portion has 2 jib halyards below the headstay and, the potential for 2 spinnaker halyards above the headstay, although we just use 1 on Rhapsody.
Finally, someone took a picture of me trying to squeeze out of the bow compartment where I was reaching to turn bolts on the bow pulpit to rebed them.

Wednesday, April 7, 2010

Misc Spring Projects

It's been a while since I posted work on the blog.  Here are some of the ongoing projects this off-season.  Thanks to Charlie Stoddard of Falcon, I now have a new set of hatch boards fabricated from Lexan and Teak. Charlie turned me on to a local plastic supply house and I was able to buy the Lexan for $60 out of their "seconds" bin.  If I ordered it new, I would have paid over $150.  The protective coating was left on to keep the surface free from getting marked up while the Teak was coated with Epifanes.

 This is the reverse side, still with protective coating.  There are a total of 6 coat of Epifanes "Wood Finish Gloss".
Once the boards were done, they were taken to the boat for fit.  It required a rasp to shave the Lexan edges so the boards fit easily in the opening.  I'm leaving the plastic coating on until the boat is ready to launch.  I made Starboard winter hatch boards that I leave in place.
The next project is to clean up the boom.  There are areas where the paint has bubbled and chipped off due to oxidation of the aluminum.  I stripped all the hardware off, the sanded the boom with 150 grit paper.  The boom was suspended in my garage so all surfaces could be easily accessed.   Areas that were bubbled were sanded aggressively to bare metal.  Once the boom was sanded, vacuumed and wiped down with alcohol, I spot primed all bare metal areas using the green looking zinc chromate etching primer.
After spot priming, I mixed a two part epoxy etching primer, thinned so I could spray using Preval disposable sprayers.  This was allowed to cure for 24 hours, then I light sanded and applied 2 coats of gloss white Rustoleum appliance paint.
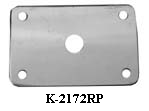
The end fittings were removed, cleaned and painted with black Rustoleum.  I also ordered a set of boom bail bearing plates from Rig-Rite to strengthen the area where the through bolt attaches the main sheet bail.  This is shown below.  When this arrives, I'll attach it with 10-24 screws by drilling and tapping the holes in the boom.
I decided that I would try and remove moisture from the hidden bilge without cutting into the boat.  A friend is in the ceramic heater business and let me borrow a propane powered one to heat the hull.  The heater is shown below.  This easily heats the boat surface to 150 degrees (hotter if you aren't careful). 

I drilled a hole 1" behind the keel and attached a shop vac to draw any moisture and water vapor out that was generated by heating the core.  There is also a tarp erected and held in place with duct tape to keep breezes off the heated area and allow the heat to be focused.
Here is a view of the "hidden bilge" area being heated.  After about 6 hours, you could feel the teak cabin sole in the boat start to get warm, which means the hidden bilge was definitely getting heat to force out moisture.  I let this rune for a total of about 20 hours.
More pictures to come with the other projects that are being worked.

Friday, January 15, 2010

Transmission Reassembly - Done!

Below are all the drive components cleaned after lapping the drive cone and the gears.  They are ready for reassembly.


The assembly of drive components was done restoring the assembly in the same order they were removed.  The pieces that were press fit were driven on using an over-sized socket around the shaft and a rubber mallet.  Below the assembly is held using the drive flange in a vice, and the end bolt torqued to 70 ft-lbs.


Once all the pieces were fit back together, they were coated with SAE 30 oil and inserted into the transmission case.  The shaft on the right side has an o-ring on the far side and is pressed into the transmission case.  This has to be assembled with all the shafts at the same time, or the gears interfere with each other if done one at a time.  There is soft setting gasket sealer applied to the flange that mates with the bell housing.  This joint must seal the oil inside the case.


The external parts that were rusted have been cleaned and primed with Rustoleum primer.  These include the transmission input and output flanges, shift lever, and I decided to paint the flexible coupling just so it matches the other stuff.  The flexible coupling is not stock on the J/30.  It was added to help reduce vibration transmitted through the shaft.


Here is the finished transmission with fresh Yanmar Gray paint on the aft end.  I also replaced the label by the shift lever to mark forward and reverse directions.  The transmission will be filled with 0.25 liters of SAE 30 oil and put on the shelf until spring, or at least a warm day when I don't need to shovel snow to get into the boat.

Friday, January 8, 2010

Transmission Disassembly & Clutch Resurface

The transmission main drive shaft was setup in a vice and a bearing puller used so that the gears and bearings could be removed. The inside of the gear is the mating surface for the conical clutch.


This picture below shows the top gear removed and one surface of the conical clutch. The clutch face has concentric rings that are about 1/32" wide. These are what mate with the inside surface of the drive gear.


Below is one of the drive gears that has the inside surface shown. This becomes a highly polished glazed surface caused by the clutch rubbing against it. I've used fine emery cloth to remove the glaze. This is all done just by rubbing the emery cloth across the surface by hand.


The picture below attempts to show one gear with the glazed surface on the right, and a gear that has been lapped with emery cloth to remove the glaze on the left.


I've kept all the pieces laid out the same way they came apart. This should help get them back together correctly.

Sunday, January 3, 2010

Winter Work 2009-2010 - Rudder and Transmission

It's been a while since I posted on the blog. This fall, I noticed some blisters returned on the stbd side when the boat was hauled. I believe these are residual effects of the old glass I left there on the outer skin after the core was replaced last year. I'm just grinding out the blisters, and will fair and barrier coat.


Last summer Rhapsody was on Block Island and had some significant transom and rudder damage when the piling we were tied up to broke off during a storm. This was documented in a post on the J/30 Forum along with some photos. The new rudder was installed for the J/30 NAs in September, but I didn't have a chance to really prepare it properly. The upper holes needed to be epoxy isolated with a stainless sleeve.

The 1st photo shows over-drilling the holes to accept the sleeve.


Once the holes were drilled and countersunk, I taped the edges and mixed West Systems Epoxy to coat the holes. The sleeves were then lightly tapped in place. Colloidal silica was added to the epoxy to make a paste so the area around the stainless sleeves by the countersunk area could be filled.


Next I needed to put on the gel coat stripe to match the waterline. I used fine line masking tape and created a mask for the stripe all around the rudder. The adjacent area was masked with wax paper. In the photo below, you can see the old rudder that was patched on the floor, with the new rudder standing upright. My basement is about 50 degrees since it is 20 degrees outside. I have a space heater warming the area so that when the gel coat is sprayed it will kick.


The rudder was sprayed with gelcoat using a preval sprayer. First I mixed the gel coat using pure white base, then gradually adding blue color to match the old gel coat. Once the color matched, I mixed about 1 ounce with hardner and thinned it 30% with Acetone. The Gel coat is the type with wax in it. I removed the filter in the pickup tube on the Preval sprayer because I have found in the past, gel coat clogs this. The photo below shows the result of spraying. There is some orange peel that I'll need to wet sand out. I also ended up using a heat gun to make the Gel coat kick, as the space heater just wasn't keeping the area warm enough.


Below is the stripe with the masking removed. Next weekend, I'll do the wet sanding and mount the rudder hardware.


Below is the transmission with the shift lever removed. The casing is being separated from the bell housing. This work is just to reface the conical clutch to make the transmission go into gear better when it is warmed up. It works fine when cold, but chatters when warm.


Here's a view inside the case with the drive gears . I need to get a 1-3/16" socket to remove the retaining nut. It's on my list of things to pick up. More next weekend.

Sunday, May 3, 2009

April Recore Work - Almost there!

It's been a while since I posted because I misplaced my camera. It turns out I put it in a tool bag returning from the boat, and didn't find it until I was sorting things out in my basement this weekend. Here are some pictures for work performed in April 2009.

The picture below shows the area adjacent to the engine intake valve in the stbd quarter berth reglassed with 2 layers. You can see I marked with a Sharpie the fiberglass pieces after cutting from the cloth. The lighter markings are visible through the translucent layer of cured resin infiltrated fiberglass on the top layer. The lower portion of the picture shows the area around the top portion of the hull valve. Remember from a previous post that I kept the old valve in place and built up an epoxy base around the valve to isolate it.


The view below is the stbd quarter berth looking aft. Note the fiberglass is tied in to a strip about 2 inches wide adjacent to the settee bulkhead for structural integrity.


A view inside the transom is shown with the engine control panel removed. A plate made from 1/2" fiberglass was bonded to the inside of the transom to serve as a doubler behind the rudder gudgeons. The original construction had this done with marine plywood that was waterlogged. There will be no chance of anything getting water logged in the future!


You can see below where I slipped with the Fein tool when removing the old core in the transom. The areas were ground down, filled with fairing compound (West Systems epoxy thickened with 410 Microlight filler), then sanded using 220 grit paper. Note the temporary hoses connected to the deck drain to facilitate cockpit draining - remember, I don't have the luxury of doing this inside an enclosure.


The areas on the stbd aft quarter that had blisters have been recored (wet balsa was the source of the blisters). The area has been faired, sanded and 4 layers of Interlux 2000e barrier coat applied. The area was feathered using an orbital sander to make it easier to match the final painted surface edges.


Here is Warren taking a break from waxing the hull in advance of wrapping the hull above the waterline in plastic so the bottom could be sanded and sprayed.


This is the result of spraying VC Offshore on the bottom. Shown is the area where the blisters were repaired. The bottom was sprayed on Saturday morning 25 April, then wet sanded on Sunday 26 April.


Sunday 26 April had record weather approaching 80 degrees. This was perfect to spray gelcoat. The transom was masked, gelcoat mixed for color match (I was lucky this time - you can't see the difference), and sprayed on with Preval disposable sprayers. Lesson learned - you really need to thin the gelcoat or the sprayers sputter and clog.


Rhapsody was launched on Friday 1 May. The transom and below the waterline where the work was done is great. Topside the boat looks like a disaster area and needs some serious preservation work and cleanup. More pictures to follow!